The following comes from William Noyes’s 1910 classic, Handwork in Wood. See also “Handwork in Wood” – Wood Hand Tools Part One: Traditional Cutting Tool Concepts and “Handwork in Wood” – Wood Hand Tools Part Three: More Chisels, Gouges, Knives.
The object of the saw is to cut thru a piece of material along a determined line. Its efficiency depends upon (1) the narrowness of the saw cut or “kerf,” and (2) upon the force required to drive it thru the material. The thinner the blade, the less material will be cut out and wasted, and the less force will have to be applied. In order to have the saw as thin as possible, almost all the people of the world, except the Anglo Saxons, have saws that cut when they are pulled toward the worker. The blade is in tension while cutting and in compression only when being returned for a new cut. German carpenters use a saw like our turning-saw. English and Americans have developed the saw on the opposite principle, namely, that it should cut on the pushing stroke. As a matter of fact, the crosscut-saw cuts somewhat on the back stroke. The pushing stroke necessitates a thickening of the blade sufficient to prevent buckling,—a not uncommon occurrence in the bands of a novice, in spite of this thickening. But tho this requires more force, and involves more waste, there are the compensations that the arm can exert more pressure in pushing than in pulling, especially when the worker stands upright or stoops over his work, and the stiffer wide blade acts as a guide to the sawyer. Each method has its advantages. Whatever may be true of hand-saws, in machine-saws the tension method, as illustrated by the gang-saw and the band-saw, is steadily displacing the compression method utilized in the circular-saw. Many kinds of work, however, can be done only on the circular-saw.
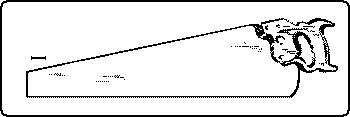
In order to diminish the disadvantages of the thrusting stroke, the modern hand-saw, Fig. 86, has been gradually improved as the result of much experience and thought. The outline of the blade is tapered in width from handle to point; it is thicker also at the heel (the handle end) than at the point; its thickness also tapers from the teeth to the back. All these tapers gives stiffness where it is most needed. It is made wide for the sake of giving steadiness in sawing. The fact that it is thinner at the back than along the teeth gives it clearance in passing back and forth in the kerf, but the friction is still great, especially in sawing soft or damp wood. To avoid this binding still further, the teeth are “set” alternately one to one side and the next to the other, and so on.

Fig. 87. Rip Saw Teeth: A-edge view, B-side view, C cross-section.
Crosscut-Saw Teeth: A’-edge view, B’-side view, C’-cross-section.
The size of saws is indicated by the length of the blade in inches. The coarseness of the tooth is indicated by the number of “points” to the inch. “Points” should not be confused with teeth as there is always one more point per inch than there are teeth. For example, a five point rip-saw has five points to the inch but only four full teeth, Fig. 87. Rip-saws run from 4 to 7 points per inch; crosscut-saws from 6 to 12 points per inch.
In general, saws are of two kinds, rip-saws and crosscut-saws.
The rip-saw, Fig. 87, may be thought of as a series of chisels set in two parallel rows which overlap each other, for each tooth is filed to a sharp edge which, at each stroke, chisels off a small particle from the end of the wood fibers.
The shape of the teeth is the result of experience in uniting a number of factors: as, strength of the individual tooth, the acuteness of the cutting angle, and the ease of sharpening. The steel of a saw is softer than that of a chisel, in order that it may be filed and set. Hence it is weaker and the edge cannot be so acute. A typical form of tooth is shown in Fig. 87, in which A is an edge view, B the side view, and C a cross section. The angle of each tooth covers 60°, one side, the “face”, being at right angles to the line of the teeth. The cutting edge runs at right angles to the sides of the blade.
This arrangement works with entire success along the grain, but if a rip-saw is used to cut across the grain, since there is no provision for cutting thru the fibers, each tooth catches in them and tears them out, thus leaving a rough and jagged surface.
In the crosscut-saw, therefore, the teeth are filed to points, and the cutting edge is on the forward side of each alternate tooth. In Fig. 87. A’ is the edge view, B’ is the side view and C’ is a cross-section. In a properly filed crosscut-saw a needle will slide between these two rows of teeth from one end of the saw to the other.
In action the points, especially their forward edges, cut or score the fibres of wood, and then the triangular elevation of wood left between the two rows of points is crumbled off by friction as the saw passes through. Thus it drops farther and farther into the cut. A crosscut-saw may be thought of as a series of knife points, arranged in two parallel rows. Ordinarily the angle of the “face” of each tooth with the line of the teeth is about 65°, and slightly steeper than the back of the tooth. The angle of the cutting edge of each tooth may be filed more acute when the saw is to be used for soft wood only.
A crosscut-saw when used to rip a board, works slowly, for there is no chisel action to cut out the fibres between the points, but the cut, tho slow, is smooth. In cutting diagonally across a piece of wood, especially soft wood, a rip-saw cuts faster, but a crosscut, smoother. In ripping a board, allowance should always be made for planing to the line afterward. In starting a cut with the rip-saw, the weight of the saw should be borne by the right hand so that the teeth may pass over the edge of the wood as lightly as possible. The left thumb acts as a guide. If the saw be handled thus, and the angle with the board be quite acute, it is not necessary to start with a back stroke. When the kerf is well started, the whole weight of the saw may be applied. An easy light stroke is better than a furious one. The line should be followed carefully, but if the saw runs from the line it may be brought back by taking short strokes near the point of the saw and twisting the blade slightly in the desired direction. If the saw binds and buckles because of the springing together of the wood, the kerf may be wedged open with a screwdriver or a bit of waste wood. A drop of oil rubbed across each side of the saw will make it work more easily.
Care should be taken in finishing a cut to hold up firmly the part of the wood which is being sawn off so that it will not split off or splinter.
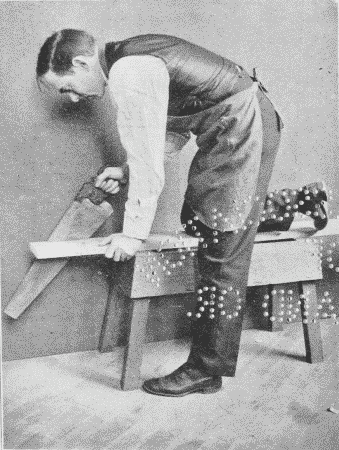
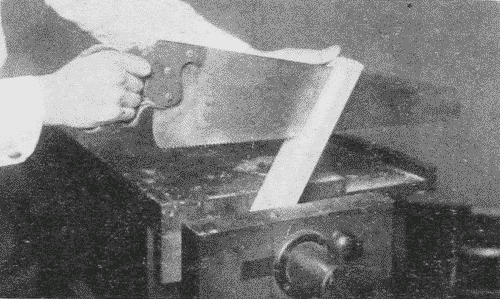
Sawing may be done either on a saw-horse, Fig. 88, or at a bench. For big, rough work, the former is the common way, the worker holding the material in place with one knee, because this method enables him to exert his greatest strength. A convenient way for rip-sawing a small piece of wood is to insert it in the vise, Fig. 89, with the broad side of the board parallel to the vise screw, and the board inclined away from the worker who stands upright. The start is easy, the sawdust does not cover the line, and the board is not in danger of splitting. The board, however, has to be reversed after it is sawn part way thru, in order to finish the saw cut.
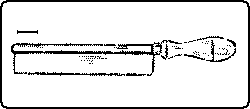
The back-saw or tenon-saw, Fig. 90. is a fine crosscut-saw, with a rib of steel along the back, which gives to it its name. Since it is intended for small accurate work, the teeth have little or no set.
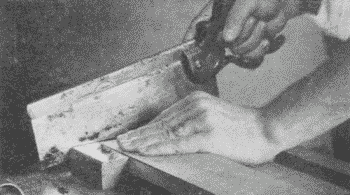
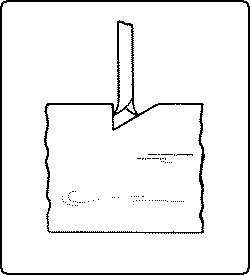
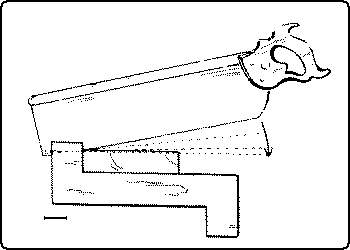
In sawing, the wood may be held either in the vise or on the bench-hook. To help start the saw and at the same time to keep the edges of the cut sharp, it is well to make a little groove with the knife, on the waste side of the line to be followed, cutting the side of the groove next to the line at right angles to the surface. The saw drops directly into this groove, Fig. 91. In starting the saw cut, the saw should be guided by holding the thumb of the left hand against the side of the saw just above the teeth. Until the kerf is well started, the saw should be held so that the teeth just touch the wood. It is better not to attempt to start the saw level, i. e., with the teeth resting clear across the wood, but the handle should be raised so that the start is made only at the farther edge of the wood. Then as the saw is gradually lowered, the kerf will extend quite across the wood, Fig. 92. When the back-saw is used for ripping, the wood is held in the vise, end up. Begin sawing as in crosscutting, that is, at the farther corner with the handle end of the saw up, and gradually drop the handle. Watch the lines on both the front and back sides, and if necessary, reverse the piece to follow them.
The dovetail-saw, Fig. 93, is a small back-saw for delicate work.
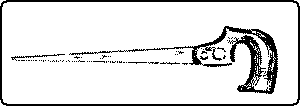
The compass-saw, Fig. 94, is narrow, pointed, thick, to prevent buckling, and with a wide set to the teeth, to help in following the curves. The teeth are a cross between the rip and crosscut teeth. It is used in sawing curves.
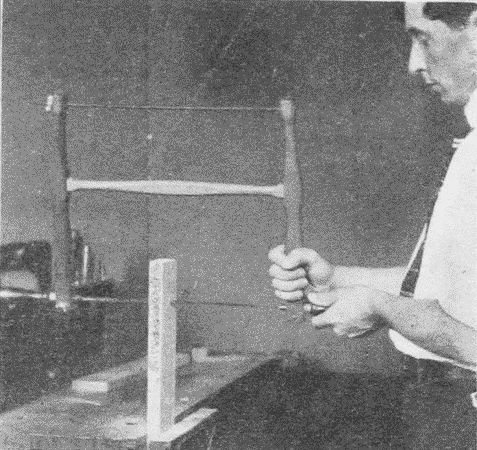
The turning-saw, Fig. 95, is a narrow saw, set in a frame, which stretches the saw tight, so that it works as a tension saw (cf. p. 62). The best frames are made so that the handles which hold the blade can revolve in the frame. The turning-saw is used chiefly for cutting curves. A 14 inch blade, 3⁄16 of an inch wide is a good size for ordinary use. The teeth are like those of a rip-saw, so that they are quite likely to tear the wood in cutting across the grain. Allowance should be made for this and the surplus removed with a spokeshave. The turning-saw may be used to cut on either the pulling or the pushing stroke, with the teeth pointed either toward or away from the worker. The pulling cut is generally better, as it puts less strain on the frame than the pushing cut. Both hands should grasp the frame as near the end of the blade as possible, Fig. 95. Turns are made by revolving the frame on the blade as an axis, which should always be kept at right angles to the surface of the board. Care should be taken not to twist the blade.
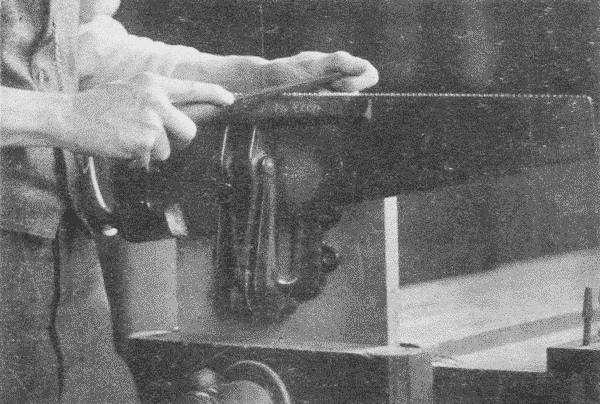
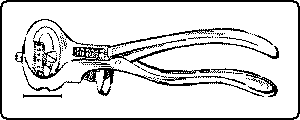
To file and set a saw, the saw is first fastened in the saw-vise, Fig. 96, with the teeth up. It is then top-jointed by running a flat file or a saw-jointer, Fig. 97, back and forth lengthwise along the tops of the teeth to bring them to a level. After jointing the saw should be set. For this purpose a saw-set. Fig. 98, is necessary. Every alternate tooth is bent in the direction of its set by the plunger in the instrument pushing against the anvil, which is an adjustable eccentric disc. After the saw is set, it is filed. This is done with a triangular file, Fig. 144, p. 90, which is held in the right hand and its point in the thumb and fingers of the left. Pressure is applied only on the forward stroke, which should be long and even, the file being raised above the tooth on the return stroke. The file should cut in the direction of the set, that is, the teeth having the set away from the worker are filed first. Every alternate tooth, 1st. 3d, 5th, etc., is filed, and then the saw is reversed and the other set, the 2nd, 4th, 6th, etc., is filed.
In filing a rip-saw the file should move exactly perpendicularly to the plane of the saw blade, that is, directly across the teeth. The filing is done on the back of the teeth, the file just touching the face of the next one. The filing is continued, with one, two, or three strokes, for each tooth, as the case may require, or just until each tooth is sharp.
In filing a crosscut-saw, the file is held pointing upward and toward the point of the saw. The file should cut in the direction of the set. The angle of the cutting edge is determined by the horizontal inclination of the file to the blade; the angle of the point is determined by the perpendicular inclination of the file to the blade. Finally the sides of the teeth are rubbed lightly with a slipstone to remove the wire edge. It should always be remembered that a saw is an edge tool, and its edges are as liable to injury as any edges.
Noyes, W. (1910). Chapter IV. WOOD HAND TOOLS. In Handwork in Wood (pp. 62-69). Peoria, Ill.: Manual Arts Press
Learn all about saws and more online here at the Heritage School of Woodworking’s Online Woodworking Courses, especially the free How to Sharpen a Ripsaw video. Be sure to check out the Basics of Joinery course; it’s got lots of sawing!

Comments are closed.