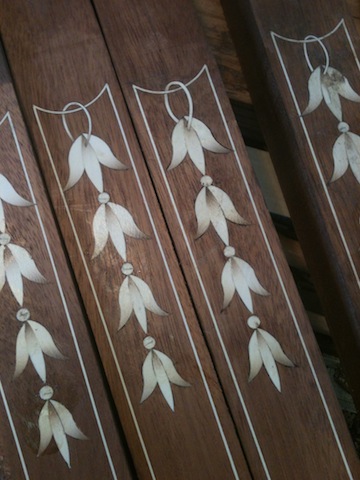
I recently mentioned in our June newsletter that I have had some time to work on a commission for a client. I have been working on a Federal style hall table, complete with multiple inlays. The past couple of weeks I have been working on the inlaid legs. I am learning quite a bit as I inlay Baltimore bellflowers; each one is graduated in size as it moves down the length of the leg.
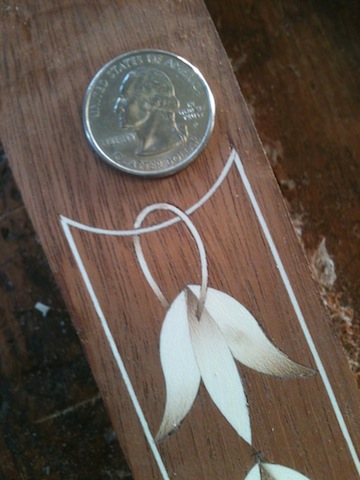
There is a little loop at the top that the bellflowers are hanging from. Inlaying that is a feat in and of itself. I have included a few pictures of the step-by-step process that it takes to set this little ring.
First the lay out, this is just drawn freehand with a pencil.
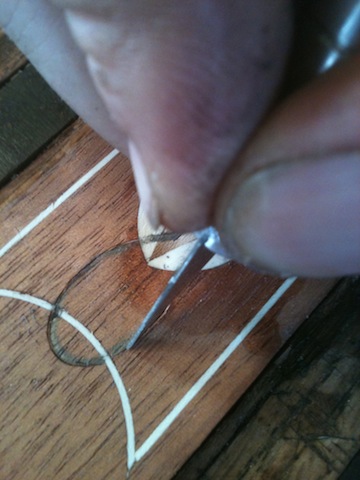
Then I cut the perimeter with a single knife blade.
Then I follow that cut with a double blade knife that I had to make. I actually just modified an exacto knife to accept two blades then put a spacer in between them to make it the right width.
You must go over each line making the cut deeper with a single blade, as the double blade really just marks the width.
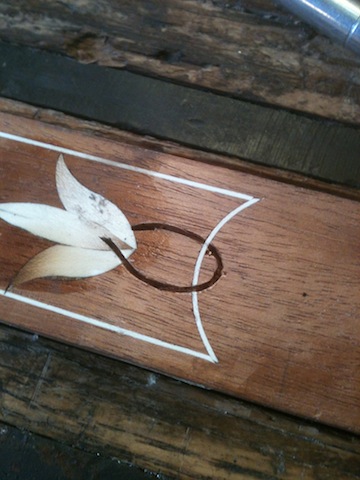
I now go back with a shop made 1/32” chisel to remove the waste; this is tricky trying not to scar the sides of the groove, especially around the curve.
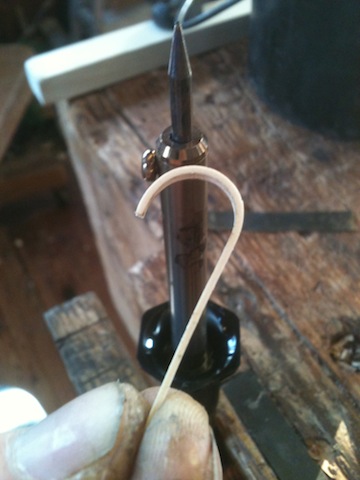
Now that we have the groove cut, we have to find a way to bend the wood around the curve to get it into the groove! A quick trip to the store to find the cheapest soldering iron is the secret here. The cheaper they are the less safety features are going to be on them, which is what we want, we want it to get hot further down towards the handle, not just on the tip so that I can use the lower part for bending.
I cut off a piece of stringing, 1/32” in thickness and bent it around the soldering iron. Now one more secret, what REALLY makes the difference here is a very thin piece of metal as a backer. I am using a thin feeler gauge; I believe it is around .0025” in thickness. Anything around that thickness is going to be just fine. You just want something that is going to bend nicely around the tight curve.
Once the curve is established we will cut it to length and then shade the ends by dipping them into hot sand. This shading really gives it a 3 dimensional look. Next we simply glue it in. You will notice that there are two separate pieces here, so that it gives the illusion of weaving in and out of the top stringing. I have been using hide glue for all the inlays. I like hide glue because it is reversible and it has great gap filling capabilities. Both of these attributes come in very handy with this type of work!
Here is the finished inlay with a quarter for size comparison.
I still have more inlays to do on the legs. Stay tuned, as I will be posting more photos as progress continues.
If you are interested in learning more about inlay, we have a day-long inlay class. I also highly recommend Steve Latta’s DVD on inlay. Steve is an excellent artist and I can’t say enough about his DVDs, they are chocked full of wonderful information. You can get them from Lie-Nielson Toolworks. Just remember that he makes it look a whole lot easier than it is, trust me, I know that first hand!


Frank this is exquisite work! Thanks for sharing the photos and techniques.
Thank you Carl, I am enjoying it, although a bit tedious at times! I will keep you updated with the progress. Today I will be doing the cuffs on the leg bottoms and then inlaying the roses. (more on that in a later post)
Real nice work. Thanks for showing.