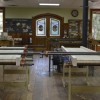
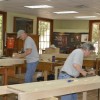
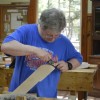
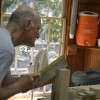
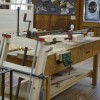
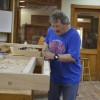
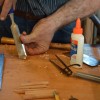
This Monday we began a workbench class! We started the day by gluing up the tops. I spent over a week pre-milling all the wood to save time during the class. We then marked all the mortises that hold the base together. We began by using the brace and bit, but that only lasted for […]
Archive | Workbenches
Oh! the many ways to build a Workbench – Class in action – Day 2
We started Day 2 of our Workbench Class by cutting the tenons for the center stretchers. We then moved on to machining the tops to finished size. One person at a time would bring their top into the machine room and we would plane it to thickness, joint one edge, rip it to 17” then […]
Close Ups! The challenges of Day 3 of our Workbench Course
The third day of our workbench course was a lot of work; hard maple is not too forgiving! We started the day by laying out the dog runs. We used a divider to find the correct spacing between the dogs, then used a hand-saw and chisel to remove most of the waste from each dog hole. […]
Workbench Class: Getting the perfect fit with Tenons, Dog Runs, Bases – Day 4
The fourth day of our workbench class began by fitting the tenons into their correct mortises; it can be quite time-consuming to make sure that each one fits perfectly. A shoulder plane is handy for this task. We then glued the dog runs that we cut yesterday, on to the bench tops. We then finished fitting all […]
Workbench Class Days 5-6. Dog run!
Friday: Flattened the dog run in preparation for extending the top tenons. Used a square, knife and chisel making sure the shoulder on the top remained straight all the way across the top. Next cut the groove in the end caps to fit the tenons on the top and cleaned the corners with the chisel, […]
Workbench Class Day 7 – Half-Blind Dovetails
We have finished the workbench class and got a little behind on keeping you up to date on what was accomplished each day. So we will be posting over the next few days some of the different steps that it took to finish the benches. It was really a great class and everyone left with […]
Workbench Class – Day 8 – Top and Legs All Glued Up!
Tuesday, Day 8 of our workbench class: Scraped each piece that was going to be glued on but that couldn’t be easily accessed after gluing. Next we glued on the outside edges of the bench, the end-caps and dovetailed pieces. We constantly double checked to make sure nothing was glued on backwards or upside-down–easy to […]
Workbench Class – Day 9: Peg, Vise, Flatten Top. Be sharp!
Wednesday: We marked and drilled with a 3/8 bit for the oak pegs that strengthen the mortise and tenon joints. Putting in the pegs, we then used a Japanese saw to cut the pegs down to just proud of the surface. Then we made sure the place were the tail-vise attached the the bench was […]
Workbench Class, Day 10: Last Day! Whew!
Thursday: last day of the class. We bolted the bases together and lag bolted the base to the top. The project finally started to look like a workbench! We then installed the front vises, glued and fit the dogs, glued and screwed the runners on for the shelf and tool tray, and sanded the dovetails. […]
On Pegging Tenons and Fixing Mistakes!
Pegging Tenons I wanted to share a couple tips and tricks with you for pegging the tenons on your workbench. I have been pegging all the mortise and tenons on these bench bases, using 3/8″ oak dowels from Home Depot. (See more posts on the current and previous workbench projects here). I start by laying […]