This past week we had a fine keepsake box class and cut many dovetails. We used the cutting gauge for marking the depth of the pins and tails so I would like to take this opportunity to iron out any confusion there may be in regards to a cutting gauge versus a marking gauge. Obviously, a marking gauge is for marking and a cutting gauge is for cutting!
More in depth, a good cutting gauge has a knife blade in it, and a marking gauge simply has a pin. The question is: why wouldn’t you just use a marking gauge for marking out your dovetails? The answer lies in which grain direction we are marking. When laying out dovetails you always mark across the grain. If I use a standard marking gauge with a pin as shown in the picture; working across the grain; we will be scratching the surface and tearing the fibers, leaving an unsightly line.
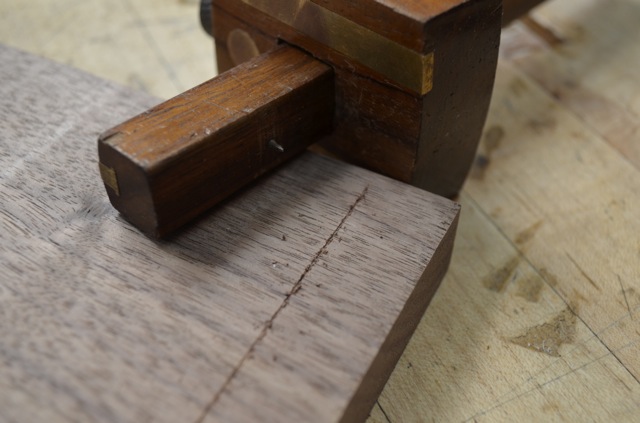
On the other hand if I use a cutting gauge, which has a single bevel knife blade as opposed to a pin; it cuts and severs the cross grain fibers, leaving a beautifully clean and crisp line across the fibers, as shown in the picture.
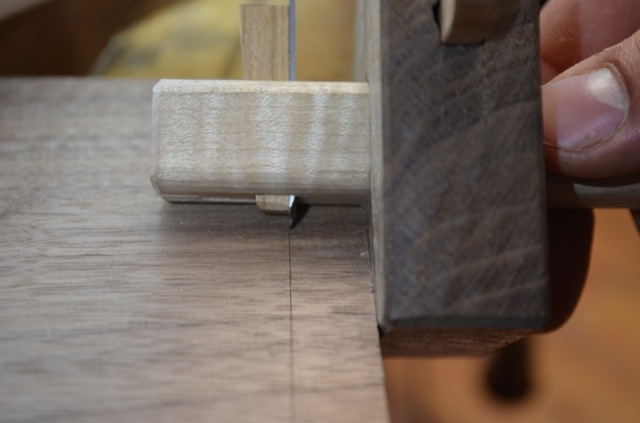
So what purpose does the marking gauge have? As a general rule, the marking gauge, (which has a pin) is used exclusively with the grain. Most marking gauges are also set up as mortise gauges and will have double pins. Mortises are marked with the grain therefore a pin is not at all a problem. The cutting gauge is most often used across the grain but still can be used with the grain. In the past I have sharpened my marking gauge pin to a knife-edge; the problem with this is that you have to make a double bevel which forces the fibers on either side of the bevel.
My cutting gauge has a bevel on one side only, thus leaving a crisp hard edge with the bevel facing the waste side. A bevel will always bruise the wood; therefore you always want to have the bevel facing the waste side.
I also use the cutting gauge when I am working on crossbanding and inlay. It really is my secret weapon for hand tool woodworking. I used it extensively when I made the rose table for cutting across the grain prior to inlay and cutting cross banding to size.
Now the question, where do you find a good gauge? There are a few cutting gauges out on the market, but most are not well made, unless of course, you want to spend a lot of money. Check the cutting gauges at H.N.T Gordon and Company!!
The main problem that I have found with less expensive gauges is that the blades are not configured correctly, that is, they are not sharpened to the right shape. The other problem that I have found is that the wedge that holds the blade in place does not offer a good positive hold.
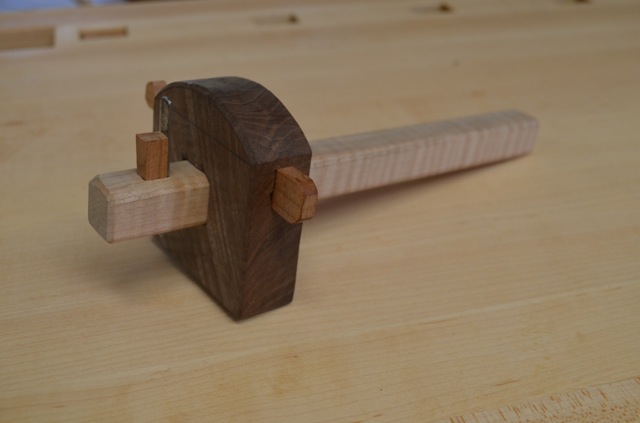
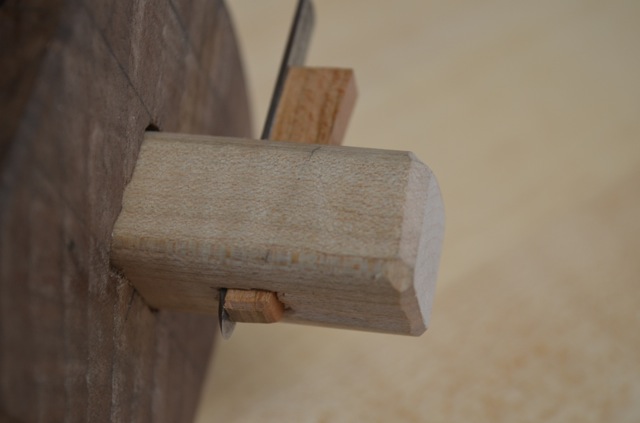
Faced with the quandary of needing several gauges for a recent dovetail class, I decided to just make some. Here is the finished gauge, and it works fabulously! I hope to write an article on how to make your own, so stay tuned. In the meantime, we are working on a tool making class which will include making your own cutting gauge. We will keep you posted on the details.
Excellent article. I recently purchased a cutting gauge from a vintage tool vendor I will bring to Fort Worth Woodworking Show, it is unique in my brief experience with hand tools. I haven’t decided whether it is a sit on the shelf or a user. I would be excited to attend a tool making class. Obviously I would recommend you add a shooting board to the list of tools. I would also throw out as another idea a wooden square as I have read about in several of Schwarz’s articles. I’ve struggled to make both of these.
Great explanation. You’ve told us this before, but I understand it better now after reading your article with the comparison pictures. Plus, I’ve recently started practicing my dovetails, ahem, using a marking guage. The results looks just like your picture here. Finally! It was the tool I chose instead of my technique. 🙂
I’m interested in the tool making classes as well as the special interest classes. Have you considered combining some of the special interest workshops into longer sessions similar to the Foundation Course?
Hi Dawn, Its great to hear from you, thank you for the comment.
I am glad the article got you straightened out on which gauge to use!
I have never thought about putting the special interest courses into a condensed week, that is a good idea, I will have to give it some thought.
It is also possible to sharpen the pin of a marking gauge to act like a cutting gauge.
When I was in Australia I met Colen Clenton and purchased one of his marking gauges. It is a work of art and I’m always so careful when I use it because I’m afraid to mess it up. I need to get over that because its a tool that is built to be used. I agree its a very expensive tool but I figure its something I’ll have for the rest of my life so why not.
I also want to take this opportunity to thank you for the great time I had taking the 6 day class and for all I learned. You taught me so much and I can’t thank you enough!
Thanks
Jeff Smith
HI Joel,
Thank you for the comment. I address this issue of sharpening the pin on a marking gauge in the fourth paragraph. Although one can do this, it really is not as effective because you will have a double bevel on the pin, thus bruising the fibers on either side of the cut. On the other hand if you have a single bevel knife, you will have a crisp clean cut for the shoulders of your dovetails, bruising only the waste side. I hope this makes sense!
Jeff, thank you too for the comment, and thank you for taking the course. Enjoy using your cutting gauge, nice tools are a real joy to use!