In many of my recent posts you have seen me talking about green woodworking, that is starting with the log. The problem, however, lies in the fact that the wood is green, that is wet and when we have wet wood it does one thing: it loses moisture and shrinks. This is something we have to contend with.
I don’t want to build furniture with wet material: I have to dry it. So I’m actually waiting for 110 rungs to dry right now.
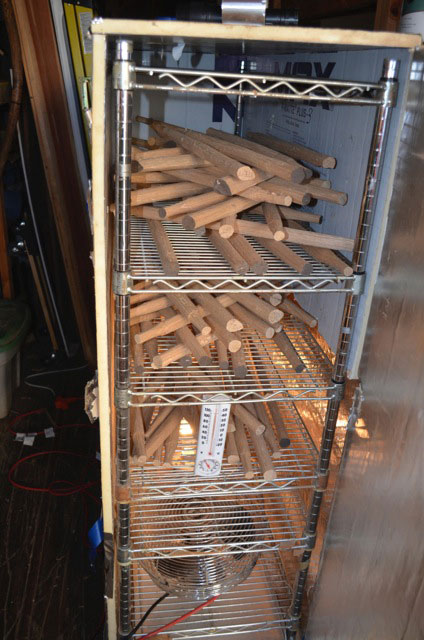
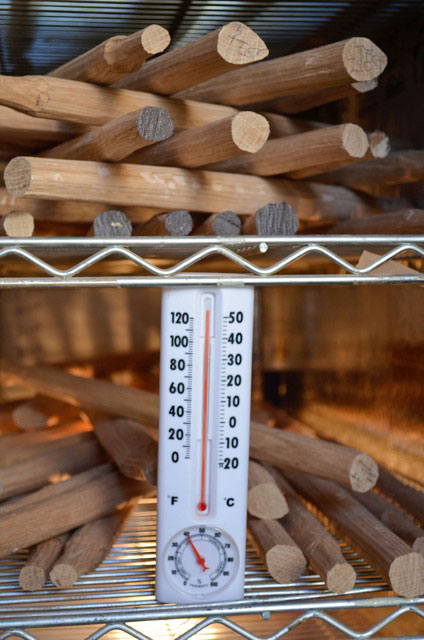
I have a special kiln that I’ve made very simply with some foam board, a couple lightbulbs and a fan.The lightbulbs are there to generate the heat and the fan to generate some air movement. I built this around a metal drying rack.
Now it’s very, very important that the rungs are bone dry. That is, all the way dry. For the chair legs. However, I want a little moisture in the legs, around 25% moisture content. That way when I put the bone dry tenon inside of the mortise in the leg which has 25% moisture content, what happens is that bone dry rung stays the same, it won’t shrink and doesn’t get smaller. However as the leg shrinks it gets tighter right around that bone dry tenon. So there you have a super tight joint using the natural shrinking abilites of the wood.
Now if you put that bone dry rung inside of a sopping wet leg, what’s going to happen? That bone dry rung is going to suck up the moisture from that sopping wet leg. That’s why you have to let that leg dry down to about 25% moisture. Not all the way dry, not bone dry but about 25% or so.
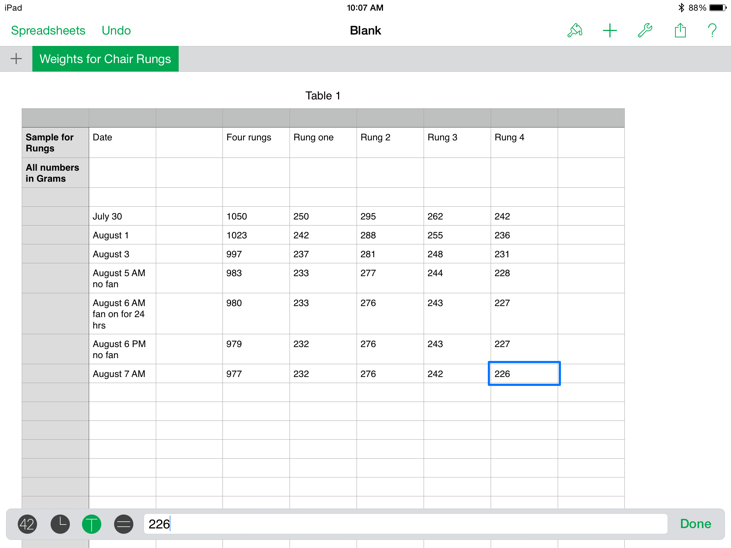
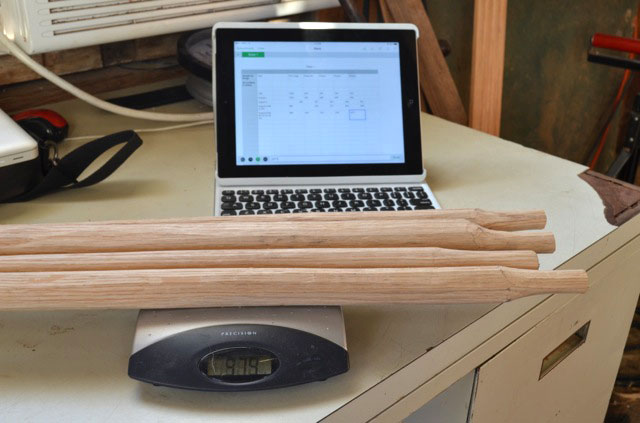
The process I use for drying as I mentioned is a simple homemade kiln and it works great, but how do I know when the wood is bone dry? “That is the question”. Well, I have here set up a very simple method. It’s a scale that measures in grams which is a very accurate means of measuring. I have four rungs that I’ve written on “Test one,” “Test two,” “Test three” and Test four”. When I put the rungs inside the kiln I simply weighed them on my gram scale when I first put them in the kiln. I created a spreadsheet on my computer (you can simply do this in a notebook, which I have done as well, just old fashioned pencil and paper!) and I simply record the weight of all four rungs combined and then for my interest I’ve separated the weights in grams again for each one of those rungs, weighing each one separately. I record the date, then I put them back in the kiln. After a day or two I’ll check it again. Again I record the weight of all the four rungs combined and then separately.
I’ll continue to do this and leave the pieces in the kiln until they stop losing weight, that is, that the weight in grams does not change. That will tell me that those pieces are bone dry and then I’ll know that I’m ready to start turning the tenons on the rungs and assembling the chair. Note that when I initially made the rungs, I made the ends oversize to allow for shrinking. Now the end of the tenons might pick up a little ambient moisture but it’s best to start with those tenon ends as dry as dry can be.
On a side note, I let the rungs air dry in a covered shady area for about 2 weeks to a month before putting them in the kiln. This is very important, you want the initial moisture in the wood to dry out some what. If you put the wood directly in the kiln, especially oak, it will crack very badly, becuase all that moisture that is bound up is trying to escape. So by letting the wood slowly acclimate, I can prevent the rungs from cracking when I put them in the kiln.
Here’s a shot of my spreadsheet:

So, a simple scale from the store, a log book and a dry kiln and we can dry our green material down as dry as is possible. As you can see from my spreadsheet I think the pieces are almost ready to go. Now I have a LOT of turning to do!
Frank Strazza
P.S., Check out our new Online Woodworking Courses. Heritage School of Woodworking is doing a Limited Time offer of 20%!


Comments are closed.