The following comes from William Noyes’s 1910 classic, Handwork in Wood. See the whole Handwork in Wood series here.
Some boring tools, like awls, force the material apart, and some, like augers, remove material.
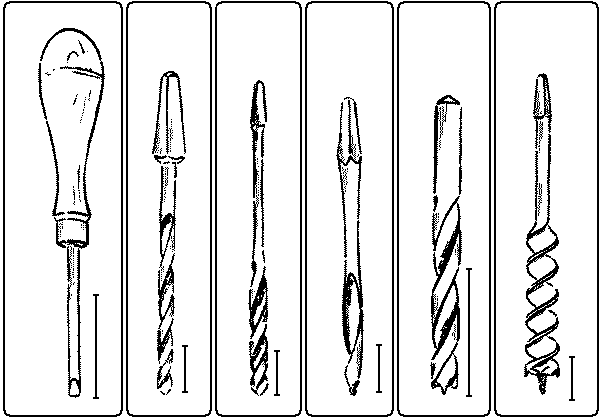
The brad-awl, Fig. 125, is wedge-shaped, and hence care needs to be taken in using it to keep the edge across the grain so as to avoid splitting the wood, especially thin wood. The size is indicated by the length of the blade when new,—a stupid method. The awl is useful for making small holes in soft wood, and it can readily be sharpened by grinding.

| Fig. 125. Brad-Awl. | Fig. 126. Twist-Drill. | Fig. 127. Twist-Bit. | Fig. 128. German Gimlet-Bit. | Fig. 129. Bit-Point Drill. | Fig. 130. Auger-Bit. |
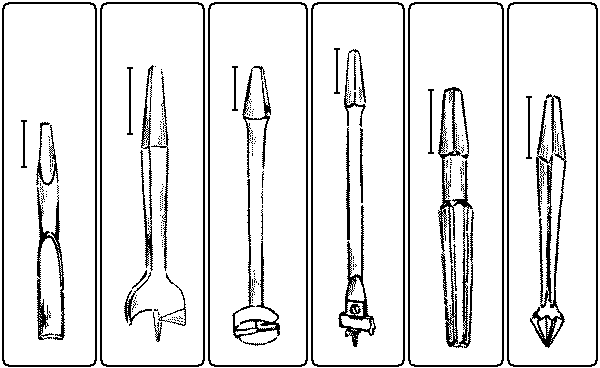
| Fig. 131. Plug-Cutter. | Fig. 132. Center-Bit. | Fig. 133. Foerstner Auger-Bit. | Fig. 134. Expansive-Bit. | Fig. 135. Reamer. | Fig. 136. Rose Countersink. |
Twist-drills, Fig. 126, are very hard and may be used in drilling metal. They are therefore useful where there is danger of meeting nails, as in repair work. Their sizes are indicated by a special drill gage, Fig. 220.Gimlets and drills are alike in that they cut away material, but unlike in that the cutting edge of the gimlet is on the side, while the cutting edge of the drill is on the end.
Twist-bits, Fig. 127, are like twist-drills except that they are not hard enough to use for metal. Their sizes are indicated on the tang in 32nds of an inch. Both twist-bits and drill-bits have the advantage over gimlet-bits in that they are less likely to split the wood.
Twist-bits and twist-drills are sharpened on a grindstone, care being taken to preserve the original angle of the cutting edge so that the edge will meet the wood and there will be clearance.
German gimlet-bits, Fig. 128, have the advantage of centering well. The size is indicated on the tang in 32nds of an inch. They are useful in boring holes for short blunt screws as well as deep holes. They cannot be sharpened readily but are cheap and easily replaced.
Bit-point drills, Fig. 129, are useful for accurate work, but are expensive.
Auger-bits, Fig. 130, have several important features. The spur centers the bit in its motion, and since it is in the form of a pointed screw draws the auger into the wood. Two sharp nibs on either side score the circle, out of which the lips cut the shavings, which are then carried out of the hole by the main screw of the tool. The size of auger-bits is indicated by a figure on the tang in 16ths of an inch. Thus 9 means a diameter of 9⁄16″.
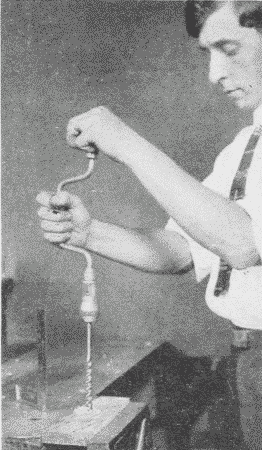
There are three chief precautions to be taken in using auger-bits. (1) One is to bore perpendicularly to the surface. A good way to do this is to lay the work flat, either on the bench or in the vise, and sight first from the front and then from the side of the work, to see that the bit is perpendicular both ways. The test may also be made with the try-square, Fig. 137, or with a plumb-line, either by the worker, or in difficult pieces, by a fellow worker. The sense of perpendicularity, however, should constantly be cultivated. (2) Another precaution is that, in thru boring, the holes should not be bored quite thru from one side, lest the wood be splintered off on the back. When the spur pricks thru, the bit should be removed, the piece turned over, and the boring finished, putting the spur in the hole which is pricked thru in boring from the first side. It is seldom necessary to press against the knob of the brace in boring, as the thread on the spur will pull the bit thru, especially in soft wood. Indeed, as the bit reaches nearly thru the board, if the knob is gently pulled back, then when the spur pricks thru the bit will be pulled out of its hole. This avoids the necessity of constantly watching the back of the board to see if the spur is thru. (3) In stop boring, as in boring for dowels or in making a blind mortise, care should be taken not to bore thru the piece. For this purpose an auger-bit-gage, Fig. 219, may be used, or a block of wood of the proper length thru which a hole has been bored, may be slipped over the bit, or the length of bit may be noted before boring, and then the length of the projecting portion deducted, or the number of turns needed to reach the required depth may be counted on a trial piece. Tying a string around a bit, or making a chalk mark on it is folly.
Auger-bits are sharpened with an auger-bit file, Fig. 142 a small flat file with two narrow safe edges at one end and two wide safe edges at the other. The “nibs” should be filed on the inside so that the diameter of the cut may remain as large as that of the body of the bit. The cutting lip should be sharpened from the side toward the spur, care being taken to preserve the original angle so as to give clearance. If sharpened from the upper side, that is, the side toward the shank, the nibs will tend to become shorter.
The plug-cutter, Fig. 131, is useful for cutting plugs with which to cover the heads of screws that are deeply countersunk.
Center-bits, Fig. 132, work on the same principle as auger-bits, except that the spurs have no screw, and hence have to be pushed forcibly into the wood. Sizes are given in 16ths of an inch. They are useful for soft wood, and in boring large holes in thin material which is likely to split. They are sharpened in the same way as auger-bits.
Foerstner bits, Fig. 133, are peculiar in having no spur, but are centered by a sharp edge around the circumference. The size is indicated on the tang, in 16ths of an inch. They are useful in boring into end grain, and in boring part way into wood so thin that a spur would pierce thru. They can be sharpened only with special appliances.
Expansive-bits, Fig. 134, are so made as to bore holes of different sizes by adjusting the movable nib and cutter. There are two sizes, the small one with two cutters, boring from ½” to 1½” and the large one with three cutters boring from ⅞” to 4″. They are very useful on particular occasions, but have to be used with care.
Reamers, Fig. 135, are used for enlarging holes already made. They are made square, half-round and six cornered in shape.
Countersinks, Fig. 136, are reamers in the shape of a flat cone, and are used to make holes for the heads of screws. The rose countersink is the most satisfactory form.
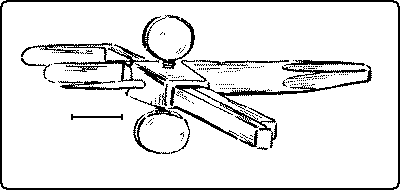
The washer-cutter, Fig. 138, is useful not only for cutting out washers but also for cutting holes in thin wood. The size is adjustable.
Noyes, W. (1910). Chapter IV. WOOD HAND TOOLS. In Handwork in Wood (pp. 83-87). Peoria, Ill.: Manual Arts Press
Learn all about woodworking and more online here at the Heritage School of Woodworking’s Online Woodworking Courses. See our Setting Up Shop blog on the basic tools you need to start out in woodworking.


Comments are closed.